
Software installation using Group Policies requires attention. We prepared a detailed instruction with screenshots illustrating installation of CrocoTime time tracking agents using Group Policies for convenience of our customers.
Installing CrocoTime time tracking Agents by means of GPO is useful in case if you have a properly configured domain and sufficient experience in system administration.
It is important to remember that all actions carried out under a user account with “server administrator” privileges. Otherwise there could be problems while installing Agents on computers in a domain.
Installing agents
Get an msi-file by clicking the “System” menu in the CrocoTime web interface and selecting “Get MSI” from the popup menu. You will need to enter the IP address and port of the CrocoTime server as: http://server:port
After entering the address, two files will become available for download: the msi-package and the modifier. The modifier is required to specify the server settings to the agent. When downloading the modifier in web browsers, e.g. Internet Explorer or Google Chrome you may receive a message “Could not verify the publisher of the program.”, choose to proceed anyway.
Move the resulting files to a software distribution folder.
Warning: the modifier should be obtained only through a CrocoTime web interface. If you obtain a mst file somewhere else it will not run properly.
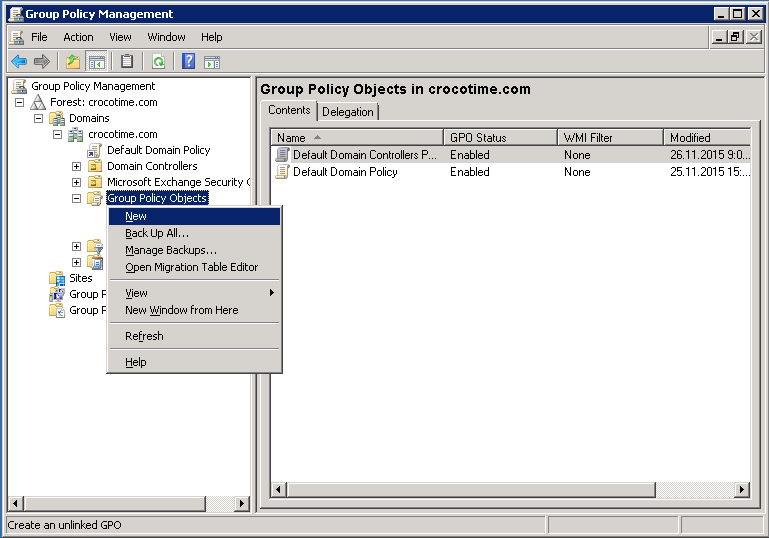
Open the “Group Policy Management” snap-in as shown in the figure:

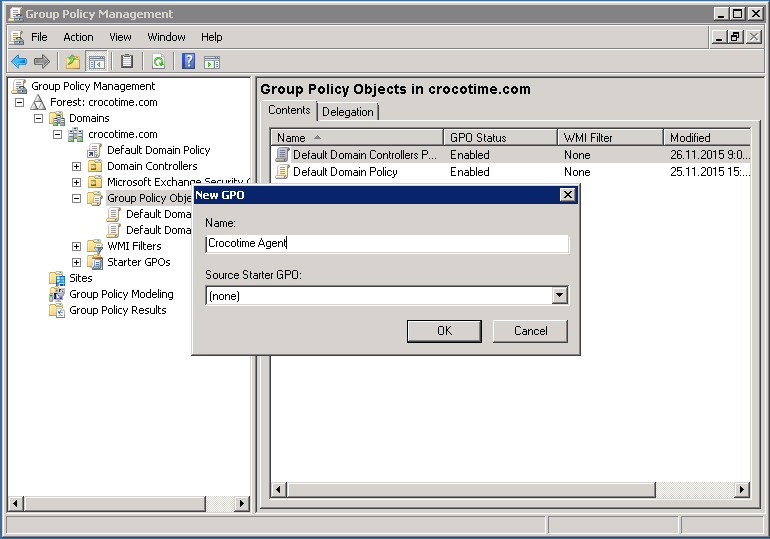
In the displayed snap-in console tree, expand “Forest: %name of the forest%”, expand “Domains” node then expand the name of your domain and then navigate to “Group Policy Objects”. Create the “CrocoTime Agent” GPO object in the “Group Policy Objects” node.
Enter a name for the new GPO object.
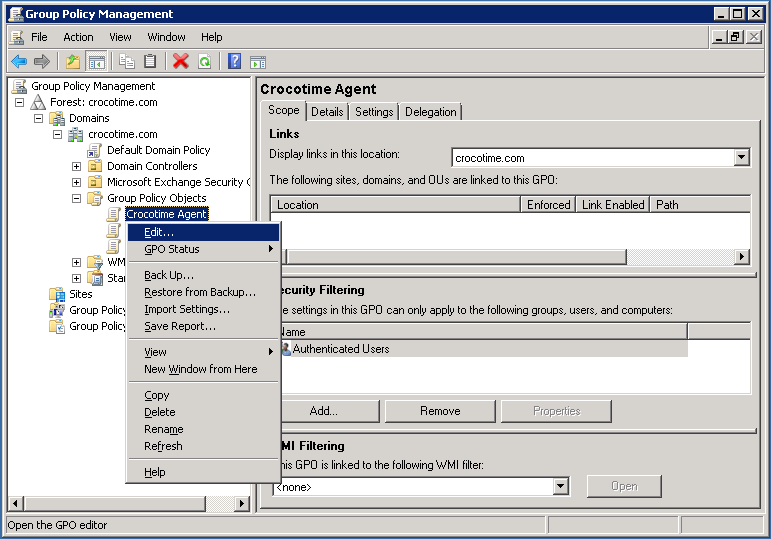
Select the GPO object you created earlier from “Group Policy Management” snap-in, click right mouse button on the object and select “Edit” from the context menu to open the “Group Policy Management Editor” snap-in:
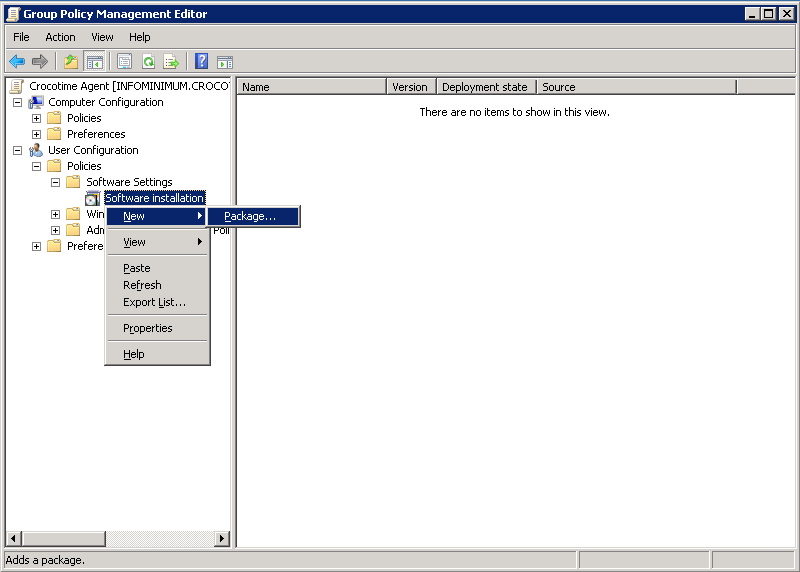
While in the “Group Policy Management Editor” snap-in, expand the User Configuration\Policies\Software Settings node, navigate to “Software Installation” node and right-click on it and choose “New” and “Package” from the context menu, as shown in the following figure:
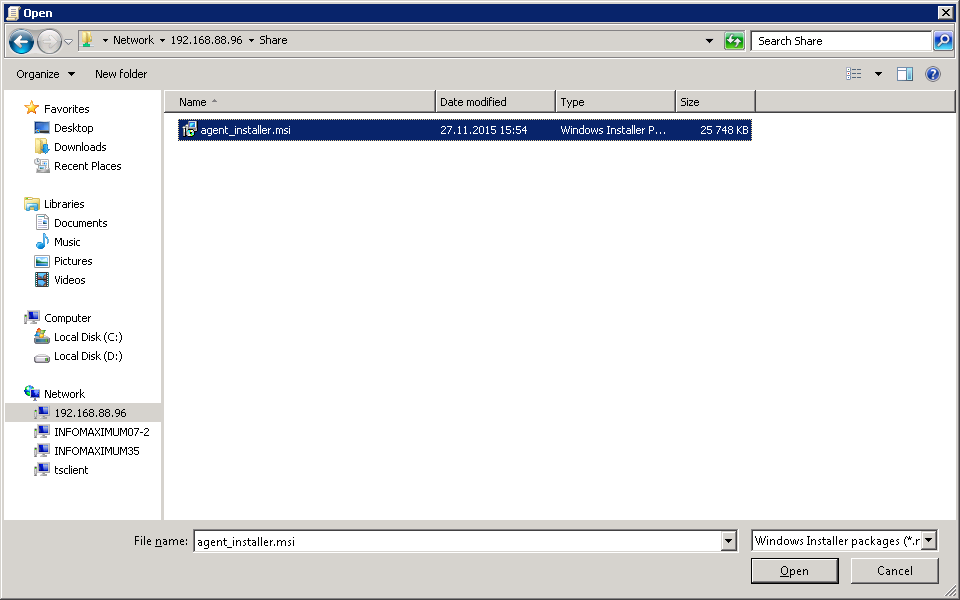
From the “Open” dialog box navigate to the previously created software distribution point and select the Windows installer file to install the software.
At this point, pay attention to the following two features:
The first, for the CrocoTime time tracking agents’ deployment you will need to select the agent_installer.msi file which is located in the selected folder (shared access to this folder should be allowed). The second, and the more important point: when selecting a folder you will need to specify not a local drive letter on your domain controller (in the case when the installation package is located on a domain controller), but a network location of the folder, as this location is published for client computers.
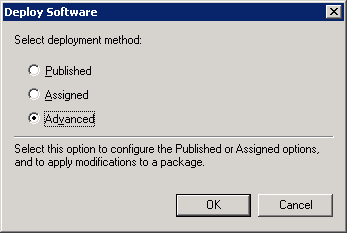
Immediately after selecting the msi-file you will be prompted to choose a method of software deployment. In the “Deploy Software” dialog box you can choose one of the following methods: “Published”, “Assigned” or “Advanced”. Select the “Advanced” method, as shown in the following figure:
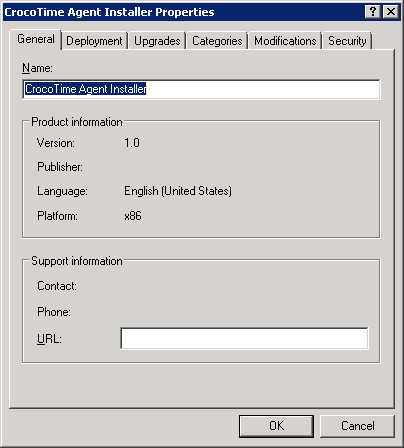
The “Properties” dialog box of the installation package shall pop up in a few seconds after choosing the deployment method. You must specify additional parameters to be used during the CrocoTime time tracking agent installation:

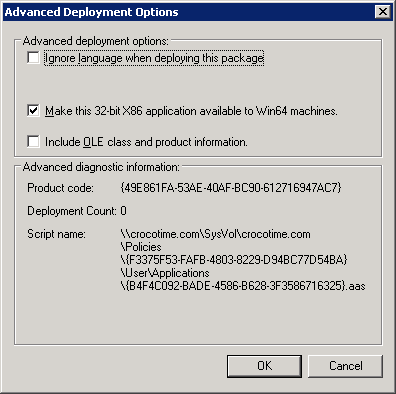
In the “Deployment” tab, click the “Advanced…” button and check the “Make this 32-bit x86 application available to Win64 machines.” checkbox.
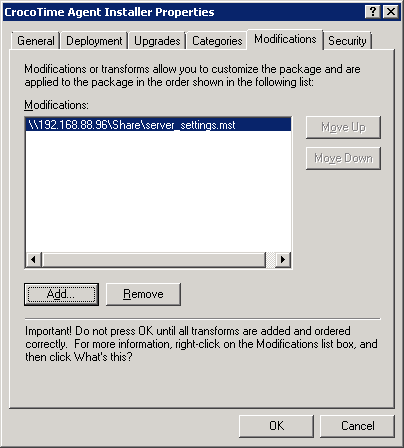
In the “Modifications” tab click the “Add…” button and specify the path to the server_settings.mst modifier file.
After all the necessary settings are made, click “OK” to continue.
The last thing to do is to link the GPO to the domain, as well as to specify user groups for computers where the CrocoTime time tracking agents will be deployed in the security filter.
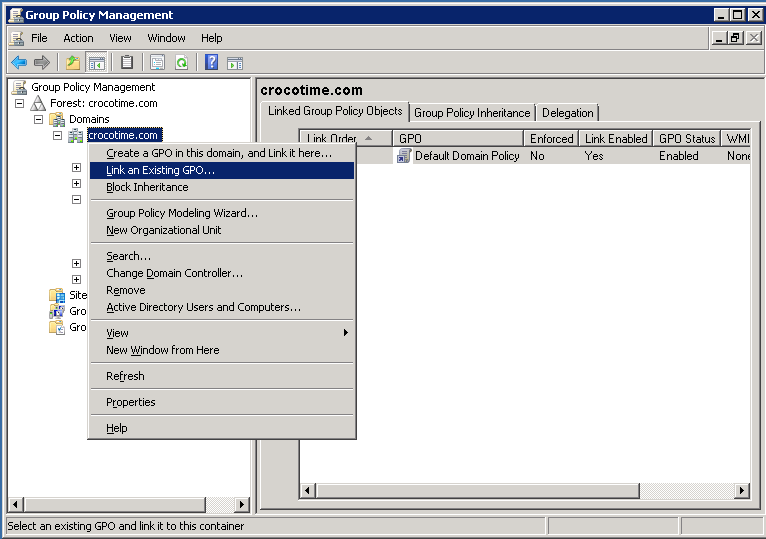
Close the “Group Policy Management Editor” snap-in and link the previously created GPO to the domain, or to a group of computers in the domain. To do this, select your domain (or group of computers within the domain) in the “Group Policy Management” console tree, right-click it and select “Link an Existing GPO…” from the context menu.
Select the GPO from the appeared “Select GPO” In dialog box and click “OK”.

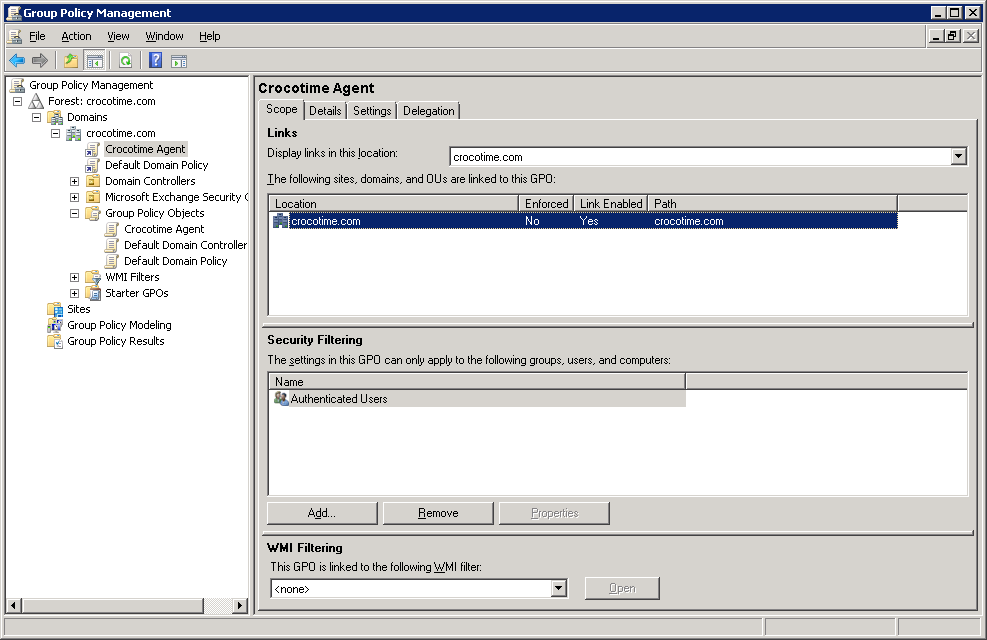
Then select the linked GPO (CrocoTime Agent) from the “Group Policy Objects” node, switch to the “Scope” tab and add user groups (to whose computers CrocoTime agents are to be installed) to the “Security Filtering”.
Close the Group Policy Management window and open a Windows command prompt and input “gpupdate /force”. The server will report that the policy setting cannot be applied without restarting and prompt you to restart. Enter “y” in the command prompt (English keyboard layout) and press “Enter”. The system will reboot shortly. Or simply restart the server through the “Start” menu.
After restarting the server, the policy will be applied. The CrocoTime time tracking agents’ installation to users’ computers will start after log off and log in of users, or when after their computers are restarted.
Removing CrocoTime Agents
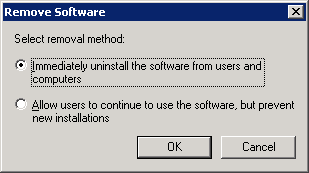
To remove CrocoTime agents using GPO, start the “Group Policy Management Editor” snap-in, expand “User Configuration\ Policies\ Software Settings”, go to the “Software Installation” node and left-click it. The selected agent will be displayed in the window. Right-click it and select “All Tasks” -> “Remove” from a pop-up menu.

After that, the “Remove Software” window will pop up. Select the “Immediately uninstall the software from users and computers” option box.
Close the Group Policy Management Editor window and open the Windows command prompt and input “gpupdate /force”. The server will report that the policy setting cannot be applied without restarting and prompt you to restart. Enter “y” in the command prompt (English keyboard layout) and press “Enter”. The system will reboot shortly. Or simply restart the server through the “Start” menu.
After restarting the server, the policy will be applied. The CrocoTime time tracking agents’ removal from users’ computers will start after log off and log in of users, or after their computers are restarted.
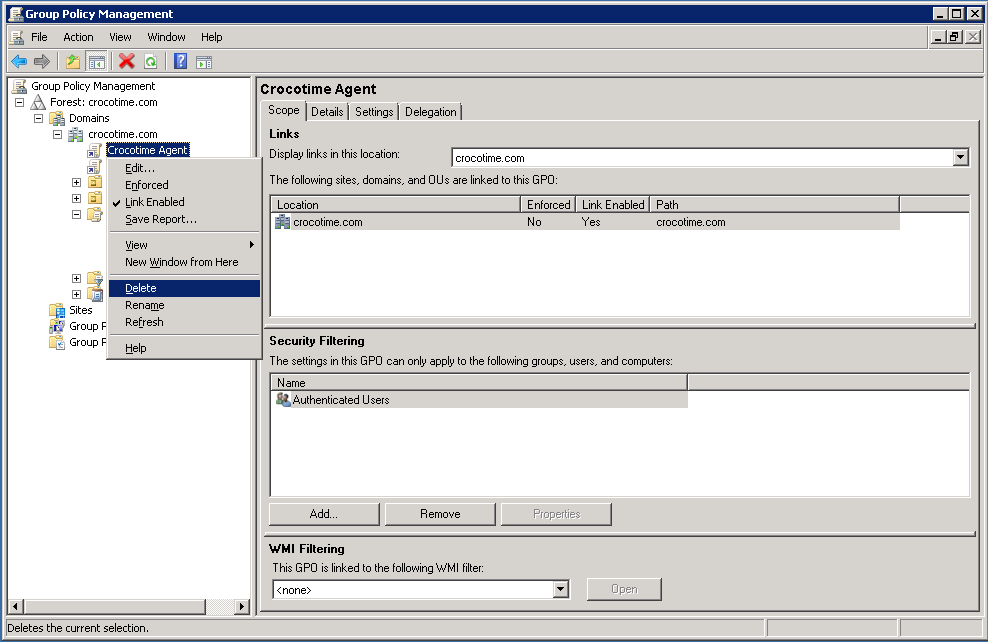
Open the “Group Policy Management” snap-in and proceed to the “Group Policy Objects” node. Remove “CrocoTime Agent” GPO from the “Group Policy Objects” node.
Removal of CrocoTime time tracking agents is completed.